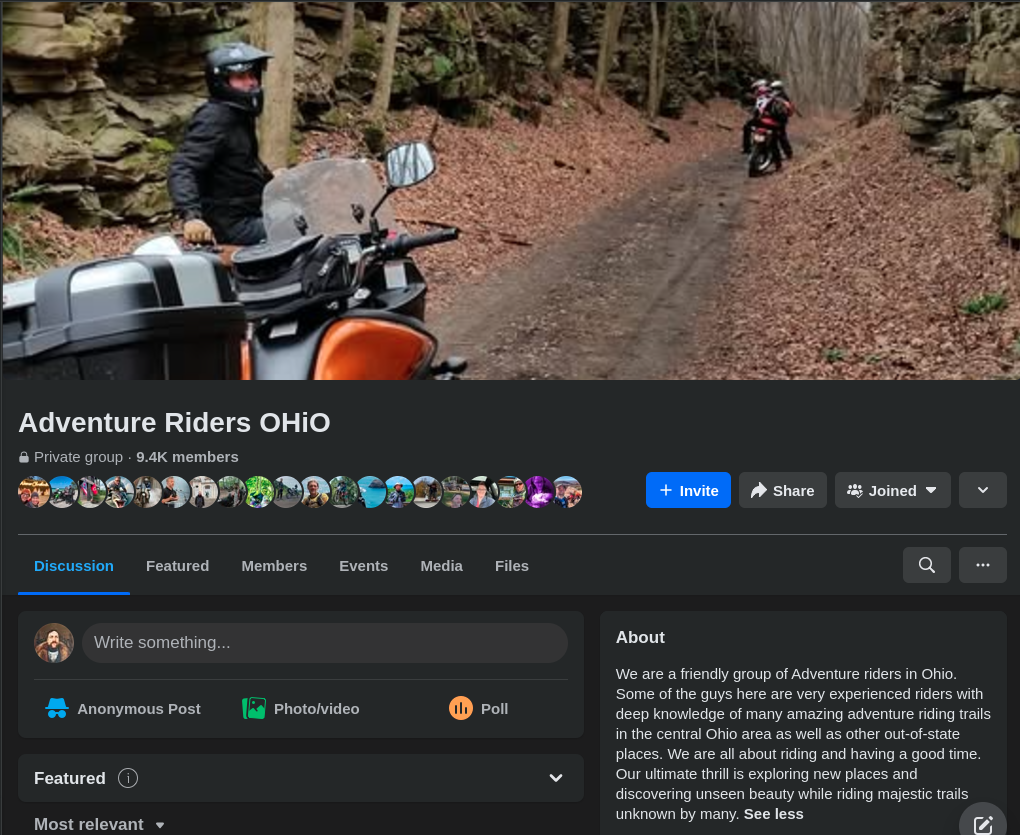
The Adventure Riders Ohio Facebook group to join if you’re new to Adventure riding and you live in Ohio. The group administrators are quite active, post cool routes, and are very responsive to questions from new people. There are nearly 10,000 people in the group as of this writing and the user base is quite active. When new users join, they’ll often see people mention riding areas which they’d also like to explore, but they’re not quite sure how. It can be a bit confusing. This article will help new users understand where to find these routes, how to download them, and how to use them with their GPS or phone.
First let’s explain the routes a bit. If you follow the Facebook group for any length of time, you’ll see people refer to these routes by name. You’ll see things like Dirty 330, ADV 201, ADV 301, GOAT, TOT, Crisscross Applesauce, or Covered Bridges. These routes sort of take on a life of their own, and people start to casually refer to them, and the areas they cover, by name. Don’t let this intimidate you, it’s just people being casual as they become more familiar with the routes and areas!
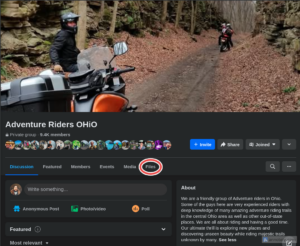
Next, let me explain the computer files you use to explore these routes yourself! There are files for most of the routes people talk about in the group. The files are all saved in a format called GPX (Global Positioning System Exchange Forma) which is a standardized way of creating and sharing waypoints, tracks, and routes. These files are usable by 99% of all phones, computers and GPSes (don’t worry, I’ll help you understand how to use them more later). The routes are saved in the Files section of the Adventure Riders Ohio Facebook Group, and can be downloaded from the Facebook mobile app, or your computer. The section is highlighted in red below:
OK, you understand what these routes are, and how to download them, but now you need to know how to use them. First, you need to explore the files section, or surf the group for a while to find a route that interests you. Each route has a dedicated page to it, but the information can be hit or miss. Sometimes people post a screenshot of what area it covers and provide some text, sometimes they don’t. Sometimes there are multiple copies of the same route because because it’s been updated or changed because of some hazard.
Even if the route you want to explore has a good description and image/screenshot of the area it covers, you’re still going to want to do some more research before you get out on your bike. Generally, this is done by downloading the file, and opening it in a GPX viewer on your phone or computer. Then, once you’ve selected a route you actually want to get out and physically explore, you’ll want to load it onto your GPS before you go!
OK, that’s the gist of how the process works! The rest of this article will describe how to use them with an Android phone and Garmin GPS, but the instructions should be similar on almost any device.
The most popular GPX file viewer on the group seems to be GPX Viewer, and it’s available on Google Play for Android. There also appears to be a GPX Viewer app in the Apple App Store for the iPhone or iPad, but it appears to be a different app written by a different person. There are also online tools which you can use in your browser, like GPX Studio (free to use) but your mileage may vary. I’ve found that many of the online tools don’t work quite as well as GPX Viewer on Android. Once you’ve downloaded some GPX files, loaded them into a viewer, and explored them a bit, you’re ready to load them into a GPS.
It seems that Garmin has the most popular GPS system, but it requires some basic knowledge. First, let me explain a few things:
- Garmin Explore: is an online app you can use in the browser to view and modify GPX files, but it’s also a smart phone app you can use on your Android phone or iPhone. Both store their data online with Garmin, and you must have a Garmin account to use either of them. The GPX files will be stored in Garmin Explore, and automatically synchronized with your GPS over WiFi at your house, or through one of the Garmin apps below if you don’t have WiFi access.
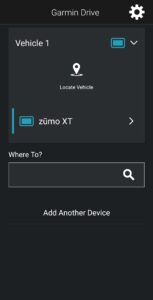
- Garmin Drive: Many Garmin devices like their Fenix watches and InReach satellite communicators are visible and synchronize right from within Garmin Explore. Regrettably, with Garmin Zumo XT devices, you need this separate program called Garmin Drive when you’re away from WiFi.
- Garmin Tread: Garmin didn’t think a separate program was quite painful enough with the Zumo XT, so they created yet another separate program for the Zumo XT 2 devices called Garmin Tread instead of Garmin Drive.
Here’s a recap of the process at a high level:
- Download a GPX file from the Adventure Riders Ohio Facebook Group files section
- Take a look at it in GPX Viewer
- Load it into Garmin Explore
- Synchronize it to your GPS using Garmin Drive or Tread
- Test it all in your driveway before you leave
- Go explore
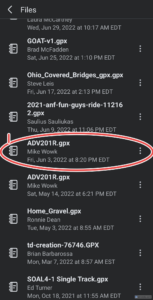
Here’s a detailed breakdown with a specific example. We’ll use the ADV201R route which covers the Loudenville, Danville, Shreve, Killbuck area of Ohio. The following steps are all done from an Android Phone and a Garmin Zumo XT GPS system:
Download the ADV201R GPX file from the files section with the Facebook mobile app:
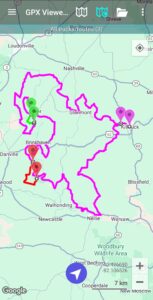
Next, check it out in GPX Viewer. Notice how GPX viewer shows three different routes. The pink is the standard ADV201R route. The green is the easy section for beginners. The red is the hero section which is a quite a bit tougher than the rest of the route:
Now, import the GPX file into Garmin Explore:
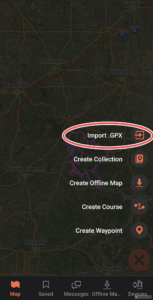
From importing this single GPX file, you’ll see three new tracks: 201R, hero, and EZ. Don’t be confused by the word “tracks” – it’s just a bunch of GPS coordinates thrown together so that your GPS understands how to draw a line you can follow!
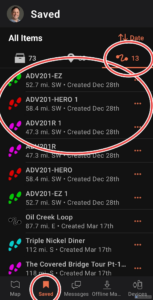
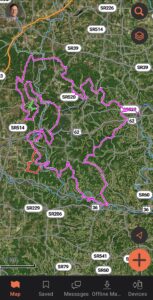
Now, view the 201R track in Garmin Explore:
Now, connect your GPS to your phone using Garmin Drive so that it can synchronize to Garmin Connect and download the latest tracks. Note, it will display the device in blue if things are connected correctly, and grey if not:
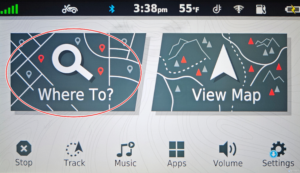
Now, go to your Garmin Zumo GPS and navigate to the tracks. Start with the Where To? button:
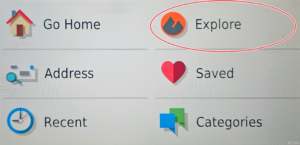
Go to the Explore section which will show you data from Garmin Explore:
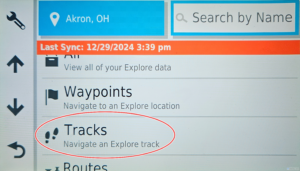
Click on the Tracks option:
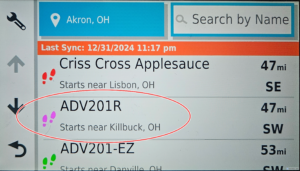
Select ADV201R Track. There are also options for the EZ or Hero sections. Ignore the duplicates, I’ve imported it several times and need to delete the duplicates:
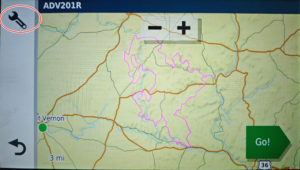
You could stop here, and use the track to navigate around the map. In fact, for tracks which are off-road and do not follow state routes or roads, this is the better method, but since most of the GPX files on Adventure Riders Ohio follow routes which are official roads, you can get turn-by-turn directions if you complete the rest of these steps. To continue, click on the wrench:
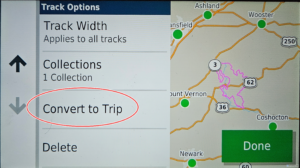
This will give you the option to convert the Track into a Trip (which give you turn-by-turn navigation):
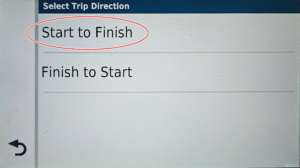
Choose which direction you want the Trip to go:
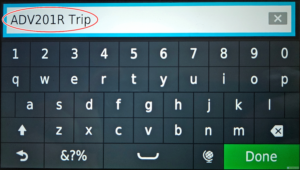
Name the Trip:
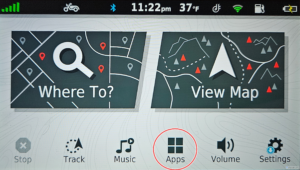
Once it’s converted go all the way back to the main menu, and click on Apps:
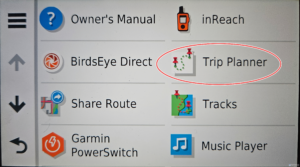
Choose Trip Planner:
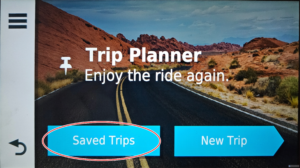
Choose Saved Trips:
Select the name of the Trip we saved in the Garmin Explore section before:
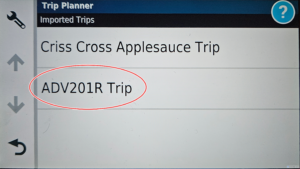
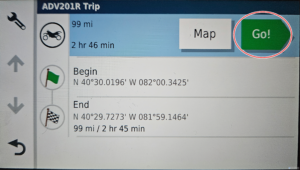
You can see the details of the trip, like how many miles, etc. Select Go:
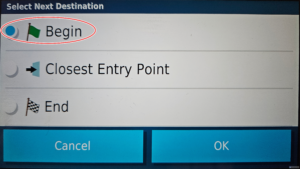
I’ve never had luck with navigating to the Closest Entry Point, so choose Begin:
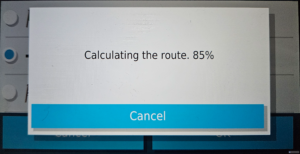
It will calculate the route from where you are to the beginning of the Trip:
Now, hit Start:
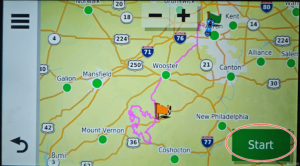
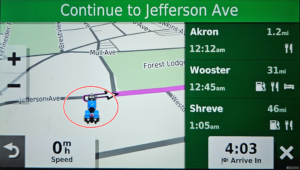
Now, the Garmin Zumo GPS will give you turn-by-turn directions to the start of the named route, and guide you through it. Pretty cool!
Garmin software is pretty tough to use, and you have to click a LOT to get anything done, but once you get the hang of it, it’s not too bad. I watched the following video and it really helped get me started with the Garmin Zumo XT I have:
I hope this tutorial helped, and feel free to leave any questions you have in the comment section. I’ll try to answer them the best I can! Happy ADV riding!

